I’ve got a few emails and questions regarding a Curled Paper that was included in my Thinking Of You page Kit.
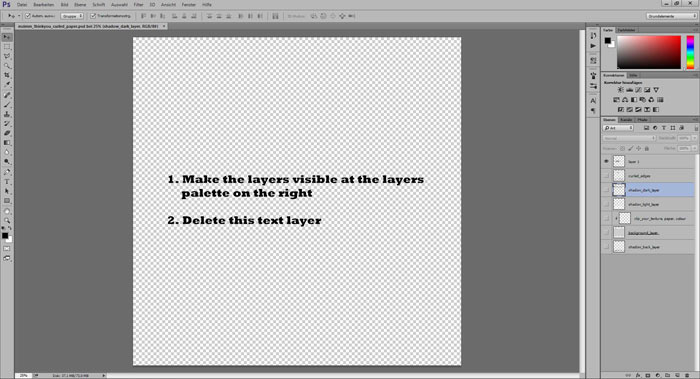
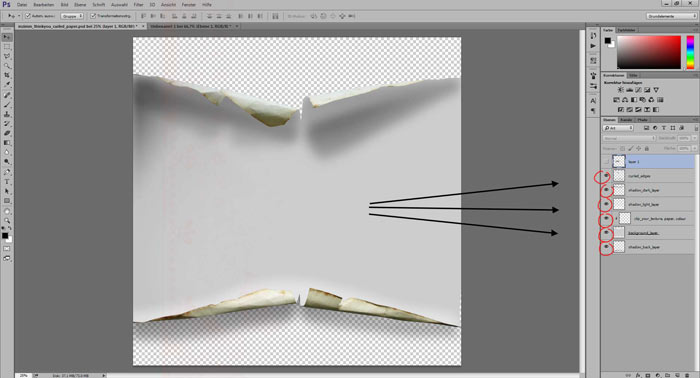
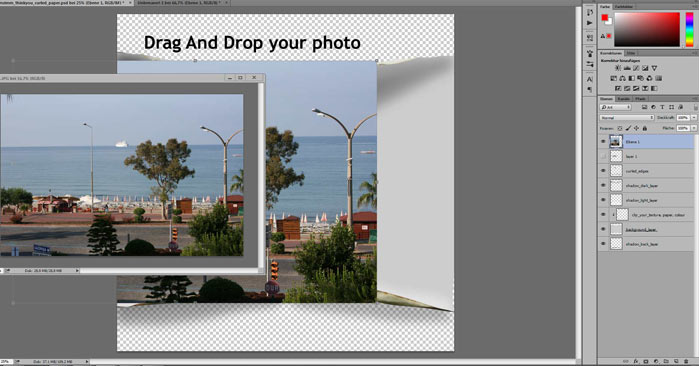
This curled paper comes in .png file format so you can use it as is but also it comes in layered .psd format so you can add your own paper, texture or even a photo and there were a a few questions I received on how to get it to work.
So I decided to post a public tutorial here now.
The screen shots below are made with Photoshop PS CC but for Photoshop earlier versions and Elements it should work the same way or in any other graphic program.
And my program is in German language but you should see on the screen shots exactly what I’ve made
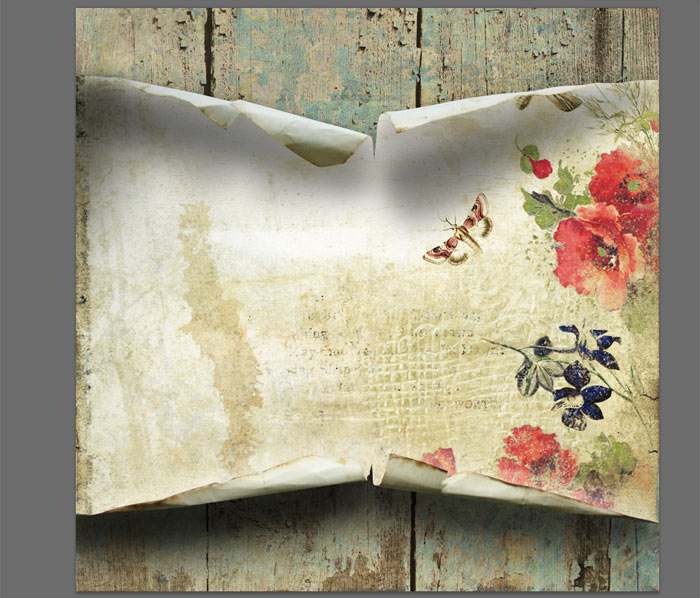
This is how it looks when you open the .png curled paper – you can use it as is – add elements or any embellishments above it:
>>> All images are clickable for larger view:
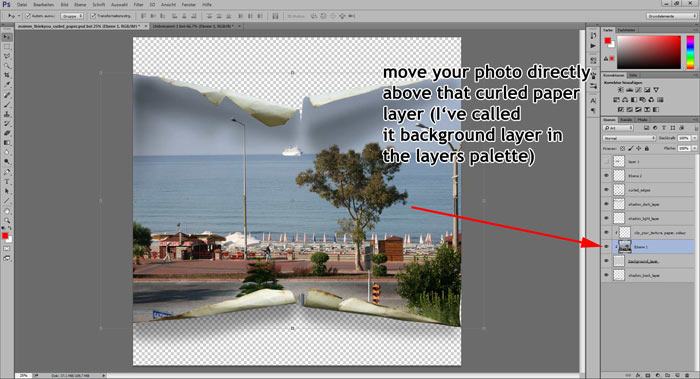
4th – Now you just need to move the photo directly on top of the curled paper layer.
It should automatically look like in the image below, but if in any case it looks not like this
you have to make/create a clipping mask.
(The photo on top of the curled paper layer, right click with your mouse on the photo in the layer palette and chose clipping mask from the drop down menu)
But it really should work automatically.


I am new … ish to digital scrapbooking, bought loads of stuff but done absolutely nothing with it. It is all on the computer waiting for me to start, but it’s a case of just where DO I start, I love you ideas and your papers, I have bought loads from a scrapbooking website that has now closed, so any help you give is valuable and the recent article is just such a thing and I for one appreciate it immensely to get me going and just having some idea of just what I do with all of my stash. Thank you so much.